Module 5 - React weather interface
⛈👀 See it live at weather.codyfactory.eu
1 What is React
React is a JavaScript library for creating the user interface (“view”) based on web technologies (HTML). React renders html from JavaScript.
2 What React is not
React is not a complete framework for creating a web application. React provides the tools for creating the user interface (“view”) and does not include a framework for fetching the data (“model”) or the logic for deciding what to display (“controller”).
Angular is a compete framework for creating web applications. React is a library for rendering the user interface.
3 Prepare your express app
Use your express weather app from the previous course.
-
Refactor your express server so that it has 2 routes:
/weather/:city👉 renders the pug template with the forecast/api/weather/:city👉 returns the json weather data as json
☝️ The code to 1) fetch the geo-coordinates for a city and 2) fetch the forecast for the geo-coordinates is the same code for both routes! Create a function that both express routes call.
Remember, you can render a pug template with
res.render("tempate-name", data)or send an object as json withres.send(data).Your code should resemble the following:
1
2
3
4
5
6
7
8
9
10
11
12
13
14
15
16
17
18
19
20
21
22
23
24
25
26
27
28
29
// Weather rendered with pug template
app.get("/weather/:city", async (req, res) => {
  try {
    const daily = await getWeather(req.params.city);
    res.render("weather", { daily });
  } catch (error) {
    console.error("An error occurred:", error.stack);
    res.status(500).send("Error!");
  }
});

// Weather API with JSON reponse
app.get("/api/weather/:city", async (req, res) => {
  try {
    const daily = await getWeather(req.params.city);
    res.send(daily);
  } catch (error) {
    console.error("An error occurred:", error.stack);
    res.status(500).send("Error!");
  }
});

async function getWeather(city) {
  // 1. get geo-coordinates for city

  // 2. get daily weather for geo-coordinates

  return daily;
}
-
Test your refactored express app in the browser and assure that both
/weather/annecyand/api/weather/annecyboth work.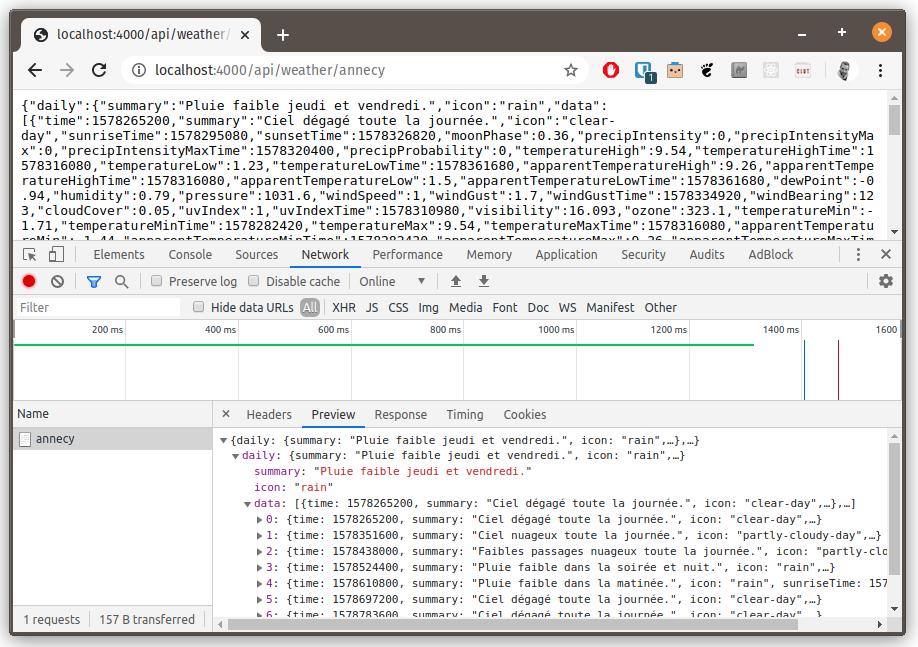
4 Create a new app for the react weather app
- From the parent directory of the
weatherproject, create a new react project for the weather interface:
   cd ..
   npm create vite@latest weather-app -- --template react
You should now have 2 separate projects:
C:/(or wherever you created your project)weather/app.jspackage.jsonviewsweather.pug
- …
weather-app/package.jsonsrc/main.jsx- …
public/- …
- …
-
Install the dependencies:
cd weather-app npm install -
Configure the proxy in
vite.config.jsto hit the express app.Our vitejs development server does not know about our express server running on port
3000. We can configure it to “proxy” certain URLs to our express server.Inside
weather-app/vite.config.js, modify thedefineConfigline to match the code below:1 2 3 4 5 6 7 8
export default defineConfig({ plugins: [react()], server:{ proxy: { '/api': 'http://localhost:3000' } } })
5 Components
React allows us to organize our code into small reusable pieces called “components”. Components are composed together to create complex user interfaces.
There several ways to write components. The traditional (pre 2019) way is a class based component that extends React.component:
1
2
3
4
5
6
7
8
9
10
11
12
13
14
15
16
class ShoppingList extends React.Component {
  render() {
    return (
      <div className="shopping-list">
        <h1>Shopping List for {this.props.name}</h1>
        <ul>
          <li>Instagram</li>
          <li>WhatsApp</li>
          <li>Oculus</li>
        </ul>
      </div>
    );
  }
}

// Example usage: <ShoppingList name="Mark" />
Components tell react what to render on the screen.
A few important points:
- A component takes a parameter named
propsand returns a hierarchy of views to display to the user in therendermethod - The
renderfunction returns a description of what you want to see on the screen. React uses that description and displays the result. renderactually returns a React element, however, most developers use JSX (the HTML looking tags in the above example)- JSX mixes HTML syntax and JavaScript! Inside JSX we can put any JavaScript inside
{ }braces. - React elements are JavaScript script objects that you store in variables and pass around inside your app.
The JSX compiler transforms return of the render function above example into this:
1
2
3
4
5
6
return React.createElement(
  "div",
  { className: "shopping-list" },
  React.createElement("h1" /* ... h1 children ... */),
  React.createElement("ul" /* ... ul children ... */)
);
☝️ Here we are only rendering typical HTML elements (<div>, <h1>, etc.), but we can render other react components in the same way. For example we can now render the entire shopping list with <ShoppingList />. This is the magic of React!
6 Functional Components
While class components are very common, they require a lot of typing and have pitfalls around using the this pointer that require a extra care. The modern way to write components is using a function syntax, also known as Functional Components.
For this course, we will use functional components.
The above component can be simplified by using functional syntax:
1
2
3
4
5
6
7
8
9
10
const ShoppingList = props => (
  <div className="shopping-list">
    <h1>Shopping List for {props.name}</h1>
    <ul>
      <li>Instagram</li>
      <li>WhatsApp</li>
      <li>Oculus</li>
    </ul>
  </div>
);
☝️ The above functional syntax requires less typing and removes some of the strange problems involving this, since we don’t use it!
7 Hello World
-
Replace the contents
weather-app/src/main.jsxwith the following:1 2 3 4 5 6 7 8 9 10
import React from 'react' import ReactDOM from 'react-dom/client' const App = props => <div>Hello {props.name}</div>; ReactDOM.createRoot(document.getElementById('root')).render( <React.StrictMode> <App /> </React.StrictMode>, )
-
In the terminal, inside the
weather-appdirectory run:npm run devThe above command should open a window in Chrome with a single button.
⚠️ If Windows opens the Edge browser, open http://localhost:5173 in Chrome.
-
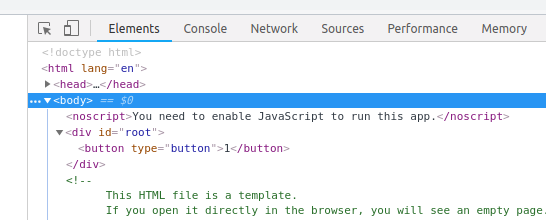
Inspect the html generated on the page (F12):

-
Install the React Developer Tools for Chrome and open the “React” tab in the developers tools.
If you cannot install the React Developer Tools for Chrome, use Firefox and install the React Developer Tools for Firefox
-
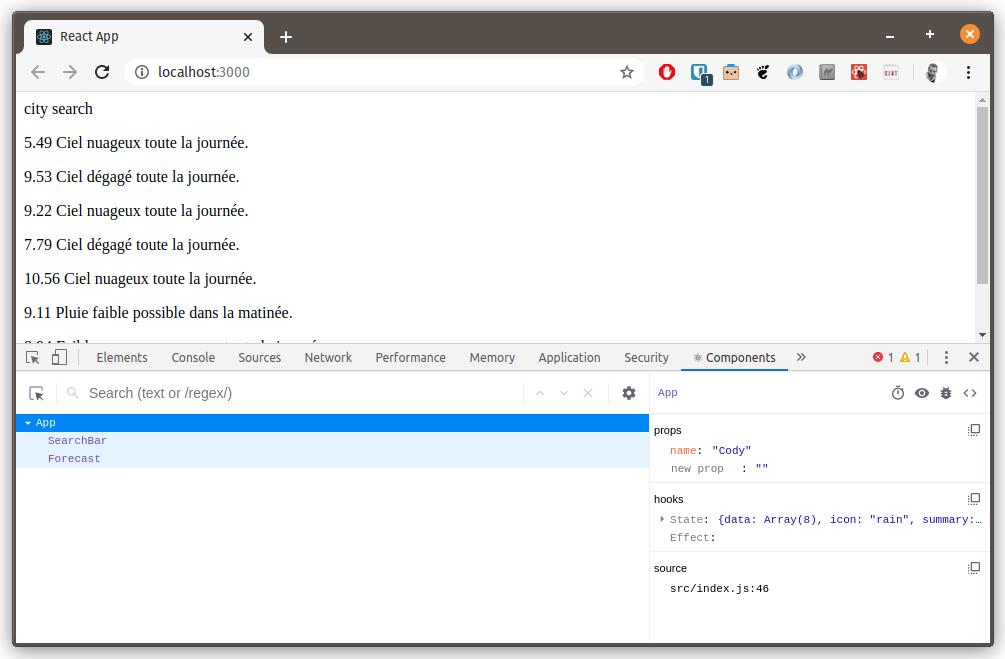
Open the “React Components” tab in your developer tools:
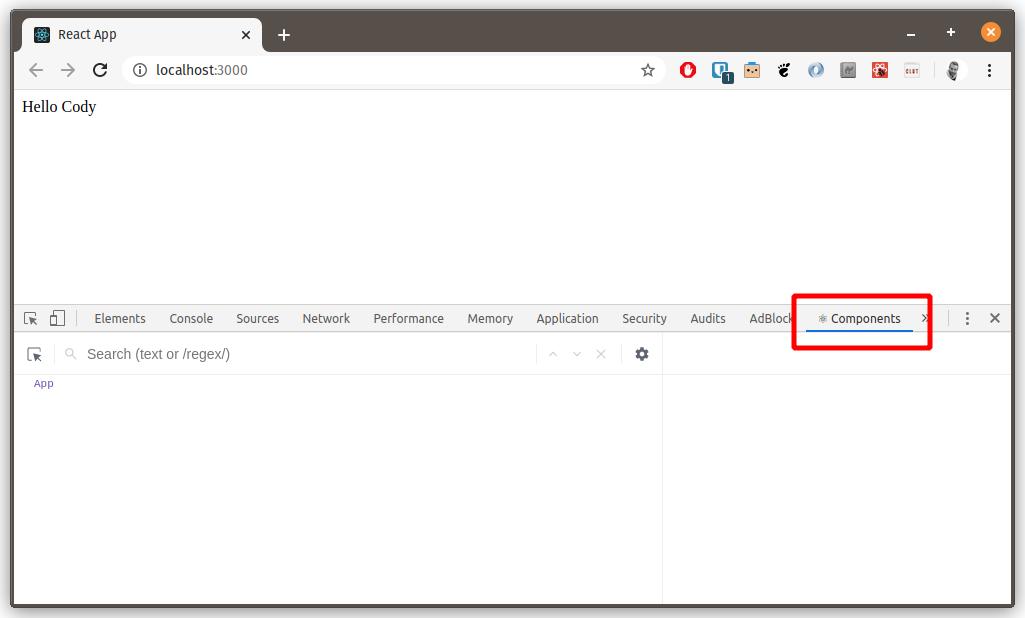
Question 7.1: Inside the react dev tools, what happens if you change the property name in the App component?
8 Add search and forecast components
Next we will add the 2 components that will make up our app: <SearchBar> and <Forecast>.
-
Inside
weather-app/src/main.jsx, above the<App>component, add a temporary placeholder for the city search. We will add input box and button later. For now, just add some text:1
const SearchBar = () => <div>city search</div>;
☝️ Here we have simple component that renders some text inside two div tags.
-
Next add a component that will display the forecast:
1
2
3
4
5
6
7
8
9
const Forecast = props => (
  <div>
    {props.weather.map(day => (
      <p>
        {day.temp.max} {day.weather[0].description}
      </p>
    ))}
  </div>
);
☝️ This component has some new concepts:
- 💡 React passes a single parameter to functional components. This parameter is most commonly named
props, short for “properties”. We will see later how we can pass data to components using properties. - 💡 As noted before, a component function returns JSX. JSX combines HTML like syntax with JavaScript inside
{ }brackets. - The forecast component adds a
divtag and then maps the daily data to return the date and max temperature surrounded byptags.
- 💡 React passes a single parameter to functional components. This parameter is most commonly named
-
Render the
<SearchBar>and<Forecast>component inside the<App>component:Inside
weather-app/src/main.jsx:1 2 3 4 5 6 7 8 9 10 11 12 13 14 15 16
// const SearchBar = ... // const Forecast = ... const App = () => { const testData = [ {temp: {max: 10}, weather: [{description: "cloudy and cold"}]}, {temp: {max: 12}, weather: [{description: "sunny and warm"}]}, ]; return ( <div> <SearchBar /> <Forecast weather={testData} /> </div> ); };
- Rather than returning JSX directly, we define some variables and an explicit
returnstatement. - For now, we use some test data for the forecast. In the following step we will fetch the data from our express app.
- Notice that we pass the test data to the Forecast component using
daily={testData}.dailyis the name of the property that the Forecast component expects and we set it totestDatainside{ }brackets since it is defined in JavaScript.
- Rather than returning JSX directly, we define some variables and an explicit
-
Test your changes in Chrome, it should result the following:
8 State
So far we have seen properties. Properties cannot be modified by a component, they are immutable. Properties let React efficiently decide when something needs to be rendered. If the properties have not changed, React does not need to re-render the component.
The code that makes up React components can be called (or “rendered”) at any time (read about the lifecycle in the docs).
Components can also have state. State can be changed by a component. When the state changes, React re-renders the component. React needs to know when state changes in order for it to decide if a component and it’s children need to be re-rendered. Therefore, when working with state, we have to make React aware.
There are of course multiple ways to manage state. In this course we will use React “hooks”. Hooks let us use functional components and work with state.
9 Fetch the weather data from the express server
We have to ask react to store the results from calling our express server in state. Since we haven’t completed the search bar, for now we will ask react to fetch the weather only when our app loads.
To accomplish the above points, we will use 2 react hooks:
useState: ask react to store some data for us and give use the ability to set and get that data. The data will remain the same each time the component renders until we explicitly change it. An example is the results of calling our weather API. Later, we will add a search box and button that will call the API and update the state.useEffect: tell react that we want to execute some code that could “effect” what is rendered. An example is calling our express server weather API.
Now that we know how and where we will store the data, we have to add the code to call our weather API!
In our express server, we used fetch to call the geo-coding and weather APIs. We can also use fetch also works on the browser to call our express weather API 🚀!
-
Fetch the weather data with a fixed city, i.e.
"Annecy".We configured our react development server to “proxy” URLs starting with
/apito our express server. Make sure the server is running.In a new terminal window, inside the
weatherdirectory, start the express server if it is not running usingnpm run devornode app.jsdepending if you added a “dev” script in thepackage.json. -
Inside the
<App>component, add a call to theuseStatehook to create “state” that will store the weather API results:In
weather-app/src/main.jsx:1 2 3 4 5 6
const App = () => { const [daily, setDaily] = useState({daily: []}); // ... // return ... };
- Pass the default “empty” state to the
useStatefunction. This is modeled on what we expect our weather API to return: an object with an array nameddailythat contains the weather for each day. useStatereturns an array containing two objects. The current valuedaily(initially the state we passed) and a functionsetDailythat can set the state.-
⚠️ Don’t forget to add
useState(anduseEffectfor later) to your imports. Modify the lineimport React from 'react';to:1
import React, { useEffect, useState } from "react";
- Pass the default “empty” state to the
-
Add an
asyncfunction into the<App>component that fetches the weather for a city.In
weather-app/src/main.jsx:1 2 3 4 5 6 7 8 9 10 11 12 13
const App = () => { const [daily, setDaily] = useState({ daily: [] }); async function searchCity(city) { const result = await fetch(`/api/weather/${city}`); const weatherData = await result.json(); console.log("WEATHER DATA:", weatherData); setDaily(weatherData); } // ... // return ... };
- Notice that we store the data into the state with the
setDailyfunction.
- Notice that we store the data into the state with the
-
Load the weather for a fixed city, “Annecy” for example.
We can ask react to call a function when a component is rendered for the fist time with
useEffect(doSomething, []). The second parameter, the empty[]array tells react to call this function on the first time the component is rendered (or “mounted”). See the documentation for details.Inside
weather-app/src/main.jsx, add the code to call our api on the first time the the<App>component is rendered:1 2 3 4 5 6 7 8 9 10 11 12 13 14 15 16 17
const App = () => { const [daily, setDaily] = useState({ data: [] }); async function searchCity(city) { const result = await fetch(`/api/weather/${city}`); const weatherData = await result.json(); console.log("WEATHER DATA:", weatherData); setDaily(weatherData); } useEffect(() => { searchCity("Annecy"); }, []); // ... // return ... };
☝️ React will now call our “effect” that searches for “Annecy” when the
<App>is rendered the first time! -
Finally, modify the line that renders the
Forecastcomponent to use thedailystate data:1
<Forecast weather={daily} />
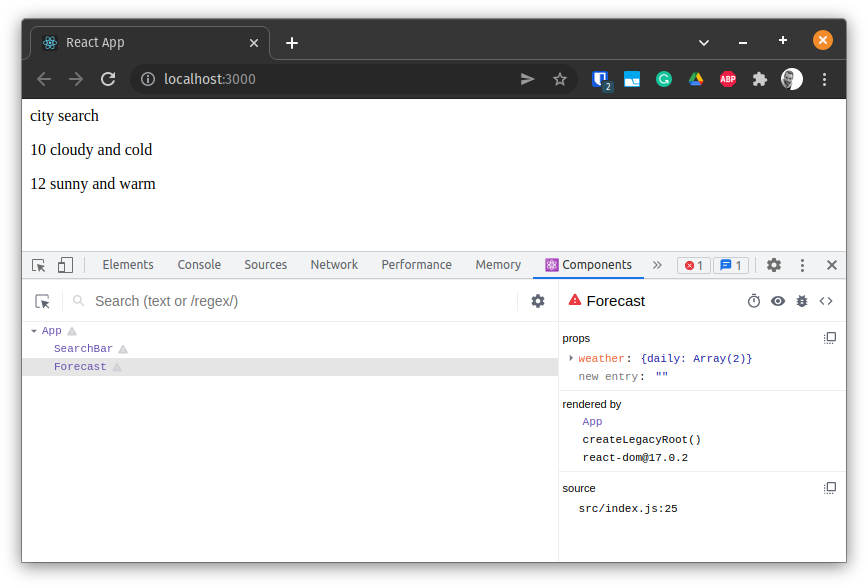
-
Test your changes in Chrome, it should result the following:
10 State Management
Managing state is a complicated task. Large projects often store the majority of the state in a single place, called “global state”. Redux is a tool for managing state. react-redux is library to work with redux in React.
11 Build out the forecast component
Exercise 11.1: Using the work you did to create a beautiful forecast with the pug templates with the express server, complete the <Forecast> component to show the summary, date, min and max temperatures for each day.
💡 Hint: consider creating a separate <Day> component to simplify the code inside the <Forecast> component.
Find inspiration from weather.codyfactory.eu. ⚠️ Don’t lose too much time adding CSS, we will take care of that in a later step!
12 Add the search box
The application still does not yet allow us to search for a city.
Next we will add the search functionality that will allow us to call the api with a city entered by the user.
We will use an HTML <form> to combine multiple input elements into a single component.
In HTML, we would create a simple search bar like so:
1
2
3
4
5
<form>
  <label>City:</label>
  <input type="text" />
  <button type="submit">Search</button>
</form>
-
Update the
<SearchBar>component to render the above form:Inside
weather-app/src/main.jsx:1 2 3 4 5 6
const SearchBar = () => ( <form> <input type="text" placeholder="City" /> <button type="submit">Search</button> </form> );
☝️ The above form will refresh the page when the Search button is clicked. We will use react to “control” the form instead.
With react, we create a controlled form by storing the input values in state and binding JavaScript events to code in our components.
1
2
3
4
5
6
7
8
9
10
11
12
13
14
15
16
17
18
19
20
21
22
23
24
const SearchBar = () => {
  const [city, setCity] = useState("");

  function handleCityChange(event) {
    setCity(event.target.value);
  }

  function handleSubmit(event) {
    event.preventDefault();
    console.log("Searching for:", city);
  }

  return (
    <form onSubmit={handleSubmit}>
      <input
        type="text"
        placeholder="City"
        value={city}
        onChange={handleCityChange}
      />
      <button type="submit">Search</button>
    </form>
  );
};
- Notice we bind the input
valueandonChangeproperties to our state and a handler function that sets the state. - We also write our event handler for the forms
onSubmitevent. This handler doesn’t do anything useful for now. It also callspreventDefault()to avoid the page refreshing when the user clicks on the Search button.
- Notice we bind the input
-
Test the
SearchBarin Chrome. Note that the search value is logged to the developer tools console.
Exercise 12.1: Connect the searchCity() function in the <App> component to the <SearchBar> onSubmit handler.
💡 Hint: pass the searchCity function as a property to the <SearchBar> component.
⚠️ Warning: be sure to remove useEffect() from the <App> component once the search bar is working.
Bonus 12.2: It is also possible to “automatically” search as the user types. Modify the <SearchBar> to eliminate the need for the user to click on the Search button.
See weather.codyfactory.eu for an example.
💡 Hint: the package use-debounce provides an excellent implementation that delays (or “debounces”) changes until the user stops typing for 1000 ms. See the Debounced Callbacks documentation.
Bonus 12.3: Give the user the option to change the forecast language.
Bonus 12.4 Give the user the option to change the forecast units (Celsius vs Fahrenheit).
13 Styling
Functionally, our weather app is working, but it is still ugly! We can easily add some style with CSS. One option would be to manually improve the style property of the html elements.
Or we can use some preconfigured styling.
Bootstrap from twitter provides some excellent CSS templates. We will only use some of the form styling, but Bootstrap offers so much more.
-
Add some more dependencies to our project.
npm install --save bootstrap @popperjs/core- Bootstrap requires popper.js, but it is not installed automatically. Therefor, we must install it explicitly.
-
Add bootstrap to
src/main.jsx:1 2 3 4
import React, { useReducer } from "react"; import ReactDOM from "react-dom/client"; import "bootstrap/dist/css/bootstrap.min.css"; import "bootstrap";
-
React lets us add CSS classes with the
classNameproperty.classis a reserved word in JavaScript, so always useclassNamein React. Lets rework the<SearchBar>form with some style:1 2 3 4 5 6 7 8 9 10 11 12 13 14 15 16 17 18 19 20 21 22 23 24 25 26
const SearchBar = props => { // ... return ( <form onSubmit={handleSubmit}> <div className="container-fluid"> <div className="row align-items-center"> <div className="col-auto"> <input type="text" placeholder="City" value={city} onChange={handleCityChange} className="form-control" /> </div> <div className="col-auto"> <button type="submit" className="btn btn-primary col-auto"> Search </button> </div> </div> </div> </form> ); };
- 👓 Note the use of the
classNameproperties in<form>,<input>, and<button>. - Refer the Bootstrap documentation for reference on how the styling works.
- 👓 Note the use of the
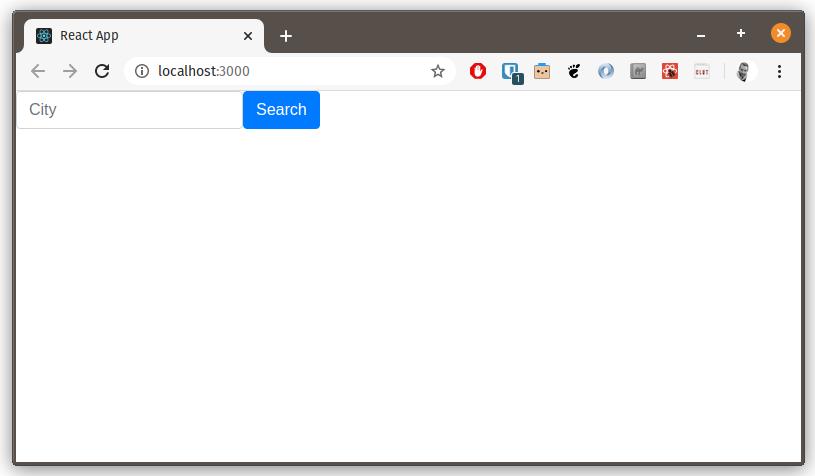
-
Observe the weather app in Chrome. There should be some beautiful style:
Exercise 13.1: Modify the CSS classes to give the app some beautiful style.
Refer to weather.codyfactory.eu for inspiration.
- 💪 BONUS: You can also use Reactstrap and React-icons to use react components avoid adding classes manually. Plus some cool icons. This is how weather.codyfactory.eu works.
14 Multiple pages
Our application only contains a single page. There are multiple ways to use react with applications that present multiple pages to the user.
Static Site
Gatsby.js is a framework that allows building multiple pages with react that can all be stored on a static web server. Each page works independently, the same way a traditional webserver works. A static site is typically the fastest way to load a usable page for users. However, there is typically no client side “state” that can be passed between pages.
Client Side Routing
React-router allows rendering different components based on the current URL. While technically there is only one page loaded, components and the URL can change as the user clicks on links on the page. This is known as “client side routing”. Client side routing often can display a “loading” screen faster than server side rending. Even if the entire time it takes to load a page is longer, the user “feels” like the page is fast.
Server side rendering
Next.js allows server side rendering where pages can be rendered on a server (similar to static sites) and routing can be done on the client. This requires a server that can render pages dynamically on demand. The advantage to server side rendering is that servers often have more resources available than clients and the time that a page is completely rendered for the user can be faster.